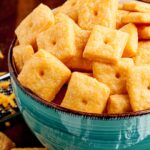
Homemade Cheese Crackers
These homemade cheese crackers are sooo much better than any store bought crackers! They're full of real cheddar cheese, they're crispy and flaky, and contain only 4 ingredients.
Servings: 6 servings
Ingredients
- 1 ½ cups sharp cheddar, good quality, freshly grated
- 4 tablespoons cold butter, cut into small cubes
- ¾ cups all purpose flour
- ⅛ teaspoon kosher salt, plus a bit more for garnish, if desired
Instructions
- In a food processor, process all ingredients until dough comes together. It should feel like play-dough.
- Shape into 2 separate disks, wrap in plastic, and chill for 30 minutes or longer in the fridge.
- Place a dough disk between 2 pieces of wax or parchment paper and roll dough out to a rectangle 1/8 in thick.
- Using a long sharp knife, cut the dough into 1-inch squares. Use a toothpick or lollipop stick to punch a hole into the centers of squares. Sprinkle a bit of kosher salt on top.
- Return cut dough on paper to fridge to chill for 10 minutes. Meanwhile, heat oven to 350F, with rack on middle lower position.
- Transfer crackers to parchment lined baking sheet, with 1/2 inch between each cracker. Bake 14-15 minutes or until crackers are puffed up, golden and crispy.
Notes
- Tap crackers gently in the oven to check for crispness. If needed, bake for an additional minute.
- Make sure your cheddar is of high quality and freshly grated for the best flavor. Pre-grated cheese often contains anti-caking agents that can affect the texture of your crackers.
- Chilling the dough is important as it allows the butter to solidify again. This will make the dough easier to roll out and the crackers will hold their shape better while baking.
- Roll the dough to 1/8 inch thickness for the perfect crispy texture. Thicker crackers may not crisp up as well, while thinner ones can burn easily.
- Don't skip the step of chilling the cut dough before baking. This helps the crackers maintain their shape and texture.
- Keep an eye on your crackers as they bake. They can go from golden to burnt very quickly, so it's important to check them often towards the end of the baking time.
- See original article for delicious serving ideas!
Nutrition (per serving)
Calories: 239kcal | Carbohydrates: 13g | Protein: 8g | Fat: 17g | Saturated Fat: 10g | Polyunsaturated Fat: 1g | Monounsaturated Fat: 4g | Trans Fat: 0.3g | Cholesterol: 48mg | Sodium: 294mg | Potassium: 41mg | Fiber: 0.4g | Sugar: 0.1g | Vitamin A: 517IU | Calcium: 204mg | Iron: 1mg