Easy S’mores Dessert Bars
- By Amy Dong
- Updated Mar. 19, 2024
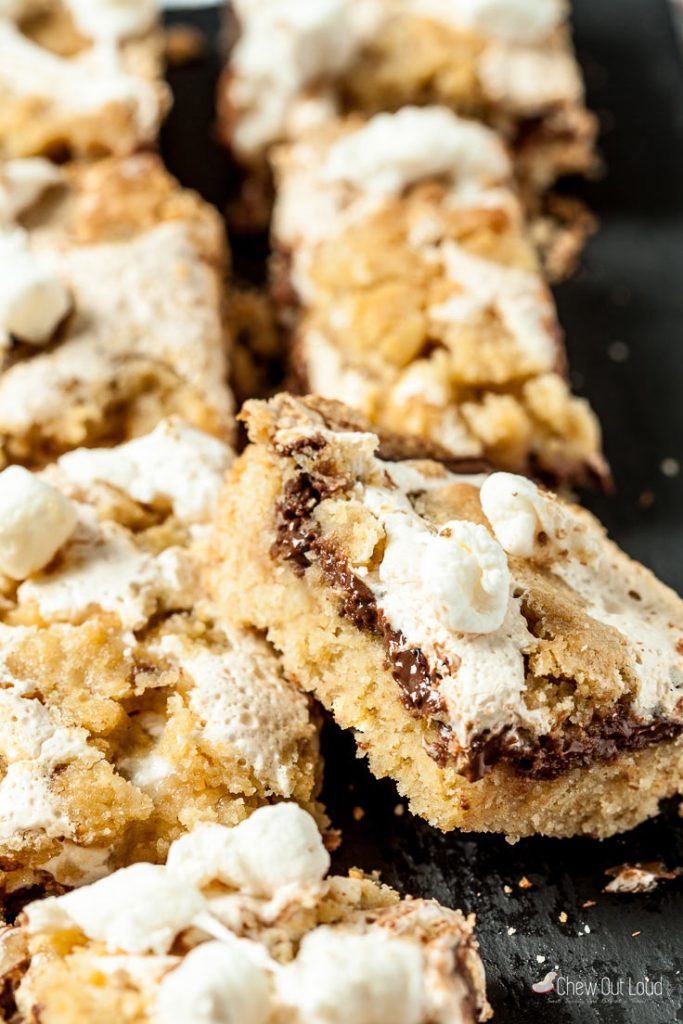
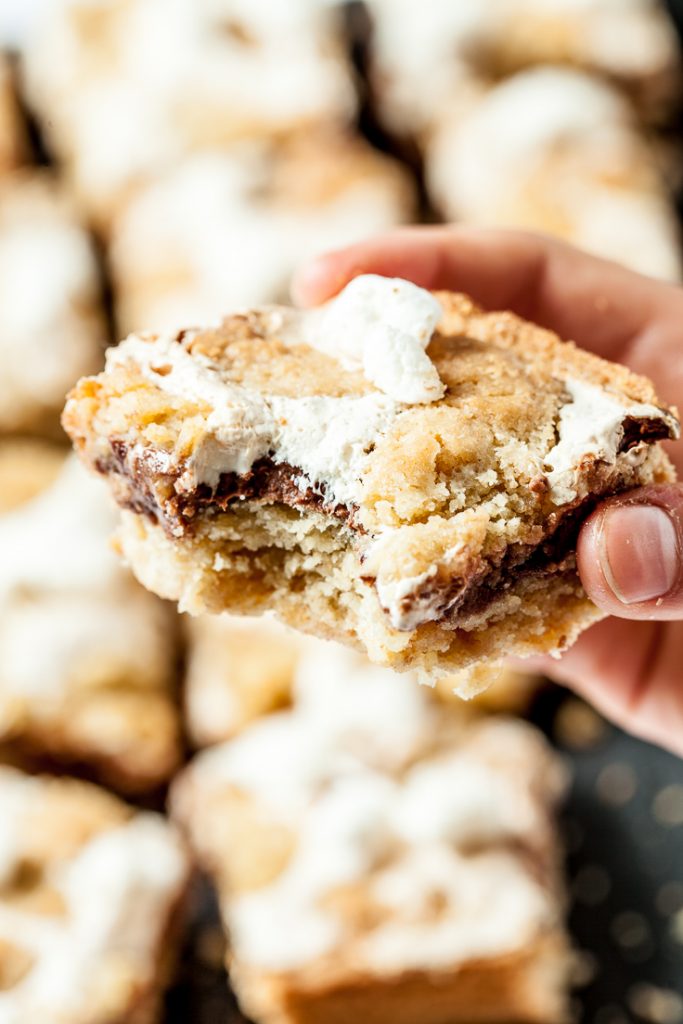
S’mores Bars are a must-have for summer gatherings! This S’mores Bars recipe makes a luscious pan of irresistible deliciousness that will be snatched up in an instant. These bars are even better than regular s’mores.
In This Article
This post may contain affiliate links, at no additional cost to you.
S’Mores Bars
The minute our weather turns warm, people can be seen gathering ’round all the backyard bonfires. A few years ago, The Littles started asking for bonfires and s’mores parties of our own. It didn’t take much arm twisting for me to oblige.
Because we’re talking about chocolate. Chocolate + melty marshmallows + friends = triple threat. All we have to do is light the fire, break out the goodies, and the neighborhood peeps magically make their way over. Before we know it, it’s a party ’round the fire pit every single time.
But what if we crave s’mores at a potluck, picnic, or whenever lighting a fire isn’t exactly feasible? All those moments are meant for S’mores Dessert Bars. It’s all about enjoying s’mores in bar form. Dare we proclaim these s’mores bars to be even better than regular s’mores? Not only are they ready to go when and where you want, but they’re melt-in-your-mouth amazing.
Know that if you make these s’mores bars, they will absolutely disappear in a blink — even faster than these potluck s’mores.
How to make s’mores bars:
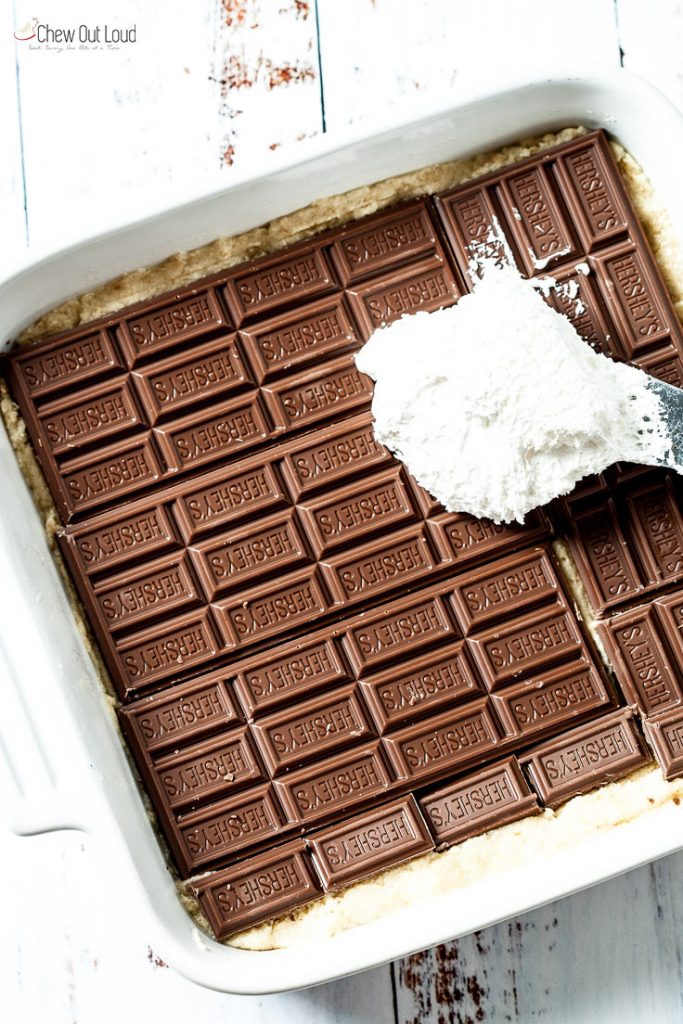
Extra delicious s’mores dessert bars recipes always start with a fabulous base. The reason these s’mores bars are even better than regular s’mores is the dreamy melt-in-your-mouth crust. It’s a tantalizing mixture of honey graham crackers and real butter, which results in a shortbread-like flavor that will light up your taste buds.
Press the cracker mixture into the bottom crust, layer milk chocolate bars on top, and follow it up with ooey gooey marshmallow creme. Top off with with a light layer of topping. So easy.
Bake until golden brown and let cool. There. That’s the hardest part…letting it cool before you dig in.
Once the s’mores bar dessert is completely cool, cut into little squares. I suggest little squares because these are decadent and dreamy and perfect in bite-sized portions.
But feel free to ignore my suggestion and go big or go home. These are your s’mores.
Why s’mores bars are a must-do this summer:
- They’re even better that regular s’mores. Truly and honestly.
- They’re easy to make ahead, slice, and serve.
- Leftovers can be frozen (if you don’t mind chewy marshmallows, which we don’t mind at all)
- You can make a huge pan of these for a big party and everyone will love you
- You’ll be known as the s’mores queen/king
Have fun and enjoy!
You’ll Probably Love this recipe also:

Smores Bars Recipe
Ingredients
- 1 cup honey graham cracker crumbs
- 1 ⅓ cup flour
- 1 teaspoon baking powder
- ¼ teaspoon table salt
- ½ cup salted butter, 1 stick, softened to room temp
- ⅔ cup brown sugar, packed
- 1 large egg
- 1 teaspoon pure vanilla extract
- 5 bars milk chocolate, 1.55 oz each
- 7 oz marshmallow creme, one container
Instructions
- Preheat oven to 350F with rack on lower middle position. Grease a 9×9 baking pan and set aside.
- In a bowl, combine graham cracker crumbs, flour, baking powder, and salt; whisk well and set aside.
- In a separate bowl, beat together the softened butter with brown sugar until "fluffy," about 2-3 minutes on medium-high speed.
- Beat in egg and vanilla extract just until combined. On low speed, gently mix in the flour mixture with the butter mixture just until incorporated; don't over mix. Place 1/2 cup of the mixture in the fridge to chill and reserve for topping.
- Use remaining mixture to press into bottom of greased baking pan, ensuring batter is evenly spread to corners.
- Place chocolate bars evenly over crust, breaking the last bar into pieces to fit the pan. Evenly spread marshmallow creme on top of chocolate.
- Crumble reserved 1/2 cup crust mixture evenly over the top. Bake uncovered, 25-30 minutes or just until top is golden brown.
- Let pan rest at room temp on wire rack until completely cool. Once dessert is cool, carefully slice into squares and serve. Leftovers can be stored in fridge or freezer in airtight container.
Notes
- Soften the butter fully before mixing. This helps create a smooth, fluffy dough that presses evenly into the pan.
- Don’t overmix the dough. Stop as soon as the dry ingredients are incorporated to keep the crust tender and crumbly.
- Chill the reserved dough. A quick chill makes it easier to crumble over the top and gives the bars a nice texture contrast.
- Spread the marshmallow creme gently. A small offset spatula or the back of a spoon works best to avoid pulling up the chocolate layer.
- Watch the bake time closely. Pull the bars out when the top turns golden brown – overbaking can make the crust too firm.
- Cool completely before slicing. This allows the chocolate and marshmallow layers to set for clean, even squares.
- Use a sharp knife for cutting. Wipe the blade between cuts to keep the layers neat.
- Try different chocolates. Dark or semisweet chocolate adds a deeper flavor, while white chocolate gives a sweeter, creamier bite.
- Serve slightly warm for gooey texture. A few seconds in the microwave brings back that fresh-from-the-oven softness.
- Store leftovers in an airtight container. Keep them at room temperature for 2 days or in the fridge for up to 4 days.
- This recipe is part of our Dessert Bar Recipes Collection.
Nutrition (per serving)
Summer Treats that Can’t be Beat:
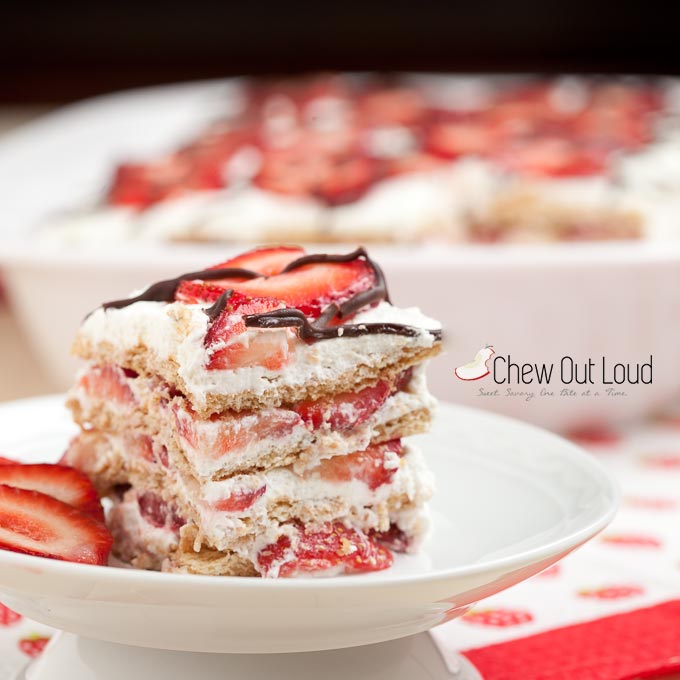
Strawberry Icebox Cake (No Bake!)