
Jam Thumbprint Cookies (Buttery, No Eggs)
- By Amy Dong
- Updated Oct. 13, 2026
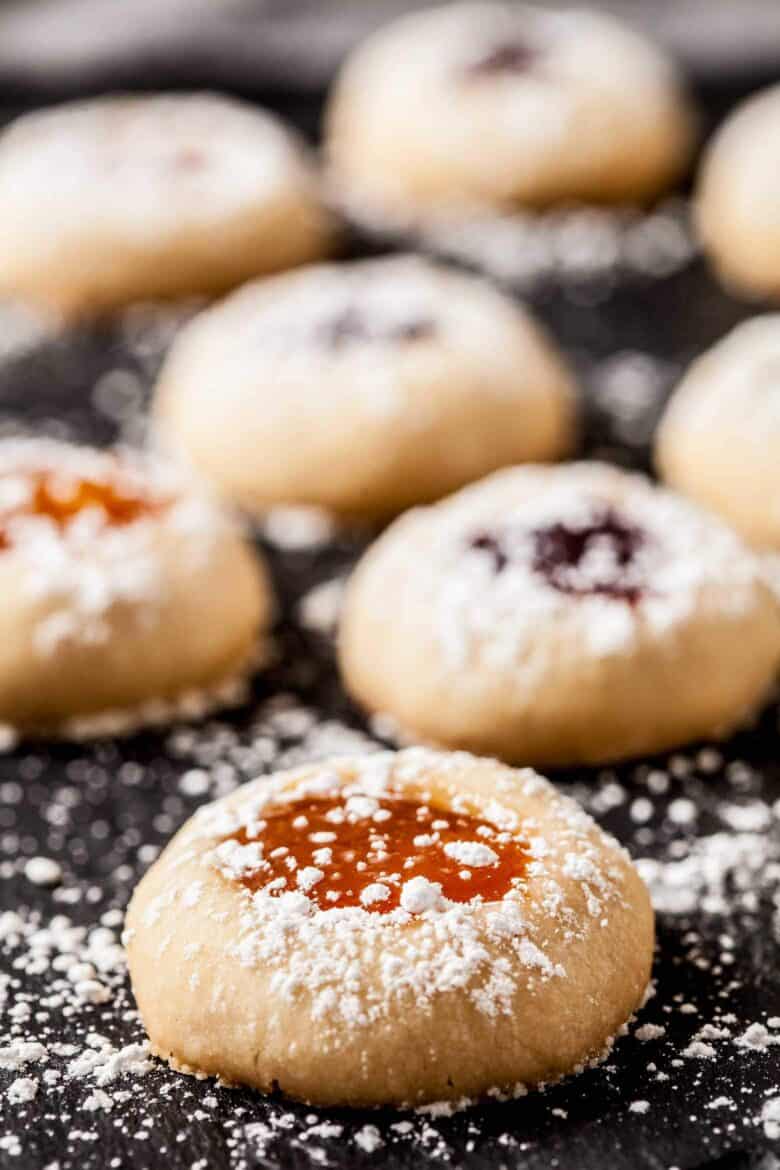
This melt-in-your-mouth jam thumbprint cookie recipe is different from most other recipes, as it has a buttery shortbread base and almond extract for big flavors. Made with 7 simple ingredients and no eggs. Taste for yourself why these cookies were crowned “The Most Pinned Holiday Cookie,” on Good Morning America and ABC News. Grab your favorite jam and let’s bake!
In This Article
This post may contain affiliate links, at no additional cost to you.
Amy’s Notes
If you want a cookie that looks like you fussed for hours but didn’t, then this is it. These are always the first to vanish from my holiday cookie tray. They’re super popular for cookie exchanges, and they also make beautiful gifts.
- Melt-in-Your-Mouth Texture: These thumbprint cookies are extra tender and buttery, like a shortbread cookie with jam in the center.
- No Eggs: Zero eggs are needed for these easy thumbprint cookies.
- Only 7 Simple Ingredients: Most kitchens are already stocked with these pantry staples.
- Freezer Friendly: Both the unbaked dough and the baked cookies can be frozen for up to 2 months.
- Flavorful: Use any variety of fruit preserves you and your family love. We’ve even made Twix Thumbprint Cookies using caramel.
- Colorful: These cookies are full of festive and fun colors and stand out at any cookie exchange or holiday cookie assortment.
Key Recipe Ingredients

- Butter: Very slightly softened and sliced thinly or diced. No melty butter, as that creates flatter cookies.
- Powdered Sugar: This is what makes them melt-in-your mouth tender. Granulated sugar results in a crunchier cookie that spreads out more.
- Vanilla Extract: provides the fragrant aroma to the cookies
- Almond Extract: Don’t skip it. A little goes a long way and makes these homemade thumbprint cookies smell and taste amazing.
- Flour and Salt: Use basic all purpose flour and regular table salt, not kosher salt.
- Fruit Preserves: Use thick, real fruit preserves. Avoid thinner jams, as they tend to become runny in the hot oven.
Substitutions and Variations
- Extract: We love the combination of vanilla and almond extracts in these thumbprint cookies, but you can use just vanilla or just almond if you like.
- Preserves: Raspberry thumbprint cookies: our most-requested version. You can use a variety of flavors, such as apricot, peach, strawberry, and blueberry fruit preserves.
- Other Fillings: Switch things up and use Lemon Curd or Nutella, like we do in our Nutella Shortbread Thumbprint Cookies.
- Gluten-Free: If you need cookies to be gluten free, use a 1:1 gluten-free flour blend. The texture may be a bit different, but flavors will still be great.
Step-By-Step Recipe Instructions


- In the bowl of a stand mixer fitted with paddle attachment on low speed, beat butter and sugar 10 seconds. Switch to high speed and beat until creamy and light, a full 2 to 3 full minutes. Add extracts and salt. Beat on medium-low speed for 10 seconds.
- Gently mix in flour, just until combined, about 1 minute. Use a rubber spatula to scrape down sides; form dough into a ball, cover, and chill 30 to 60 minutes.


- Roll tablespoonfuls of dough into 1-inch balls. Press down the center of each ball with round end of a wooden spatula or use your finger, making a deep well in the middle.
- Fill cookie centers with roughly 1/2 tsp preserves. Place sheet of cookies in fridge 5 minutes to re-chill before baking. Bake 20-23 minutes or until golden brown and puffy.
➡ For full list of ingredients and instructions, please see recipe card below.
How to Keep Thumbprint Cookies From Spreading
Slightly Softened Butter
It’s super important that your butter is only slightly softened, but not at all melty. Butter should be just soft enough to give a little bit when you gently press.
Beat a Full 2-3 Minutes
Beat the semi-soft butter with sugar for a full 2-3 minutes, until mixture is light and “fluffy.” Then add the remaining ingredients and beat only until dough comes together into a sticky ball that needs some time to chill.
Narrow, Deep Wells
I trend toward smaller cookies, about 1-inch size dough balls. The center well should be deep but not too wide; this prevents the cookie from spreading out too thinly during baking.
Fruit Preserves, Not Jam
Be sure to use high quality, real fruit preserves, versus a sugary jam or “fruit spread.” This will ensure the filling stays thick throughout baking. Sugary, thin jams tend to become runny in the oven.
How to Prep Ahead (or Freeze)
- Make Dough in Advance: Chilled dough wrapped airtight keeps well for up to a week in the fridge.
- Freeze for Later: In an airtight container freeze dough balls (already pressed with wells) up to a month. Let thaw in fridge and proceed with recipe.
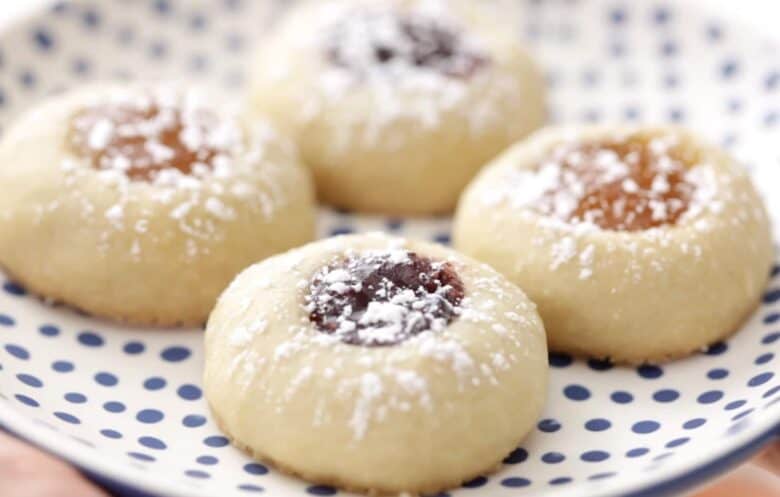
- Fully Bake: Baked cookies, wrapped airtight, freeze well for up to one month. Dust with powdered sugar after thawing.
Video: Watch Me Make This Recipe
Buttery Jam Thumbprint Cookies
Ingredients
- 1 cup unsalted butter, very slightly softened and sliced
- ½ – 1 cup powdered sugar, see notes
- 1 teaspoon pure vanilla extract
- 1 teaspoon almond extract, see notes
- ½ teaspoon table salt
- 2 cups all purpose flour
- ½ cup real fruit preserves
Instructions
- In the bowl of a stand mixer fitted with paddle attachment on low speed, beat butter and sugar 10 seconds, or until lightly combined. Switch to high speed and beat until creamy and light, 2 to 3 minutes – do not rush this part.
- Add extracts and salt. Beat on medium-low speed for 10 seconds, scraping down bowl as needed. Gently mix in flour, just until combined, about 1 minute. Dough will be somewhat sticky. Use a rubber spatula to scrape down sides; form dough into a ball, cover, and chill 30-60 minutes.
- Preheat oven to 325°F with rack on middle position. Line a baking sheet with parchment paper or silicone baking mats.
- Roll tablespoonfuls of dough into 1-inch balls. Place dough balls on lined baking sheets. Press down the center of each ball with round end of a wooden spatula or use your finger, making a deep well in the middle; deep but not very wide.
- Fill cookie centers with roughly 1/2 tsp preserves – easiest to use a piping bag or a 1/4-teaspoon-sized measuring spoon. Place sheet of cookies in fridge 5 minutes to re-chill before baking.
- Bake 20-23 minutes or until golden brown and puffy. Let cool 5 minutes on baking sheet, then gently transfer to finish cooling on wire rack.
- When cookies are completely cooled, dust with confectioners' sugar and serve.
Notes
- Butter should be softened at moderate room temperature for about 30 minutes; it should not be melty at all.
- It’s important to measure flour accurately. We use the scoop and level method.
- If you’d like less sweet and compact-looking cookies, use 1/2 cup powdered sugar. If you’d like sweeter cookies that spread a little more, use 1 cup powdered sugar.
- Cookies will taste like the jam you use, so be sure to use high quality, thick fruit preserves (any flavor). Avoid thin jams or fruit spreads, as those can become runny during the baking process.
- Don’t skip the almond extract, as it gives a wonderful, aromatic depth of flavor. If you prefer, you can omit it and use 2 tsp vanilla extract.
- These cookies are not intended to brown much; they’ll be shortbread-colored. If you want more browning on top, bake on upper-middle rack.
- I bake these 20 minutes for a melt-in-your-mouth texture. If you prefer a bit crisper/browned texture, bake up to 23 min.
- If the jam settled more than you’d like during baking, feel free to top off finished cookies with a smidge of fresh jam on top.
- Cookies can be kept in airtight container at room temperature for up to 3 days. For longer storage, cover them airtight and freeze for up to 1 month.
- If you loved this recipe, please give it a rating – it helps keep your favorite recipes alive on our site. Plus, we ❤️ hearing from you.
Nutrition (per serving)
Frequently Asked Questions
Classic thumbprint cookies are made with pure, simple ingredients such as butter, sugar, flour, and your favorite real fruit preserves.
Use high quality, real fruit preserves. Preserves are thick and will hold shape better during baking. Sugary, thin jams or “fruit spreads” often becomes runny during the baking process.
It’s best to fill the cookies before baking. The jam bakes right in and sets up glossy. Top off the baked cookies with a bit of fresh jam once they cool.
Be sure butter is only slightly softened, and not at all melty to start with. Ensure that your cookie dough is adequately chilled prior to forming cookies, as chilled dough keeps its shape during baking. Lastly, be sure to use real fruit preserves and not “fruit spreads” or thin jam in the center.
Absolutely. Keep raw dough covered airtight and chilled for up to a week, or frozen up to a month. Let thaw just until dough is easy to work with, but still cool to the touch.
Baked cookies should be kept airtight. They’ll keep for several days at moderate room temperature, up to a week in the fridge, or up to a month in the freezer.
The culprit is typically overly soft butter or dough that’s not chilled enough. Thin jams can contribute as well. Stick with thick fruit preserves.
More to Bake and Eat
- Salted Caramel Cookies – these are the easiest salted caramel cookies you’ll ever sink your teeth into!
- Forever Chewy Chocolate Chip Cookies – if you love chewy chocolate chip cookies, these are 100% for you. They stay chewy for days, if you can keep them around that long.
- White Chocolate Macadamia Nut Cookies – these are our all-time favorite white chocolate cookies. They’re chewy, nutty, and taste amazing.
- Brown Butter Chocolate Chip Cookies – these cookies are from none other than Cook’s Illustrated’s beloved cookbook.
- Brown Sugar Cookies – these are perfect just the way they are; simple, chewy, irresistible.
- Russian Tea Cakes – a simple cookie that’s big on flavor and a favorite for the holidays!