Stabilized Whipped Cream
- By Amy Dong
- Updated May. 20, 2026
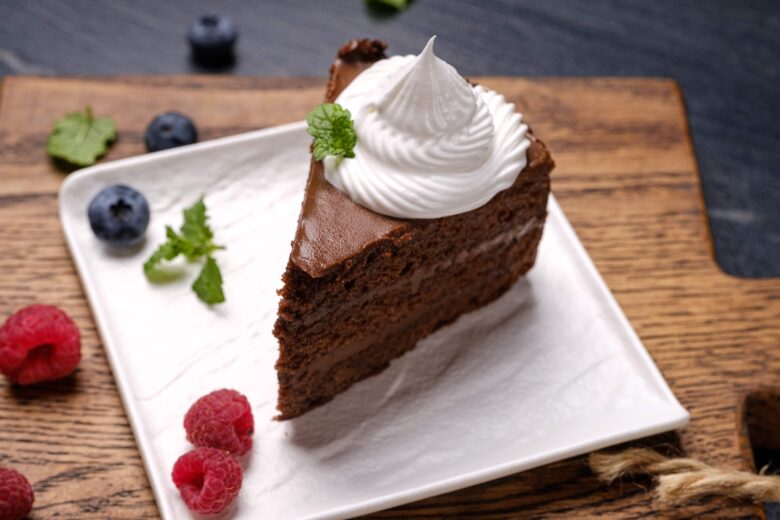
This Stabilized Whipped Cream recipe makes light and fluffy whipped cream that won’t melt or get watery. And it’s so easy to make! Now you can serve whipped cream on all your favorite desserts with confidence.
In This Article
This post may contain affiliate links, at no additional cost to you.
Video: Watch Us Make This Recipe
Why This Recipe Stands Out
A dollop of fluffy whipped cream elevates any dessert. And would you believe us when we say this Stabilized Whipped Cream is even better? Here’s why:
- Simple: It takes just 5 simple ingredients (and that’s including water!).
- Fast: It only takes about 10 minutes to make homemade whipped cream.
- Keeps Shape: This perfectly fluffy topping is “resilient”. It doesn’t get runny at moderate room temperatures.
- Freeze: You can even freeze stabilized whipped cream for future use.
- Flavor: It’s absolutely delicious – so much better than store-bought!
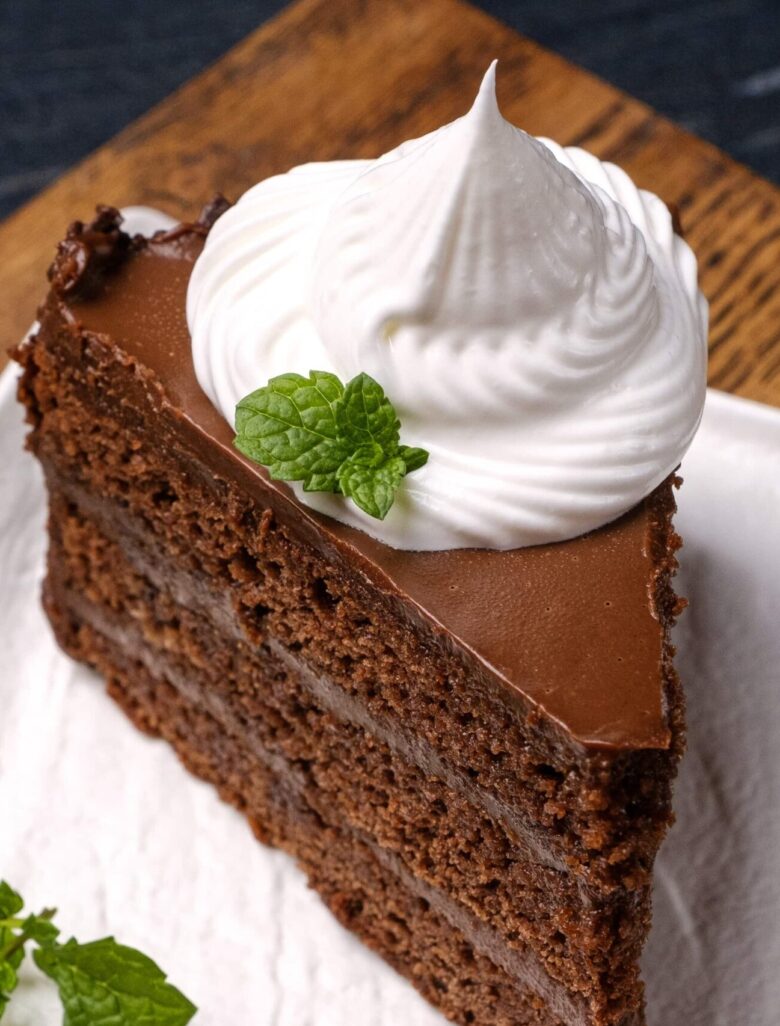
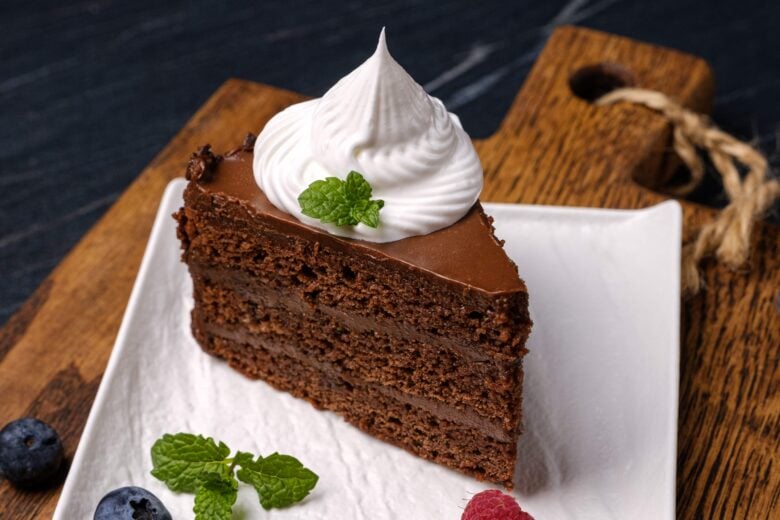
- Flexible: It’s incredible on all the desserts, like decadent flourless chocolate cake and white chocolate raspberry cheesecake.
What Is Stabilized Whipped Cream?
Stabilized Whipped Cream is simply classic whipped cream that has a stabilizer added to it, making it hold its shape longer. In this recipe, we use unflavored gelatin to keep the whipped cream’s shape for days. But this delicious topping can also be made using things like cornstarch, marshmallow fluff, and milk powder for a lighter, not so long-lasting hold.
Needless to say, Stabilized Whipped Cream is the perfect option for baked desserts like Angel Food Cake or Pumpkin Pie. You can top these desserts days in advance without having to worry about the whipped cream melting and making things soggy.
Key Ingredients
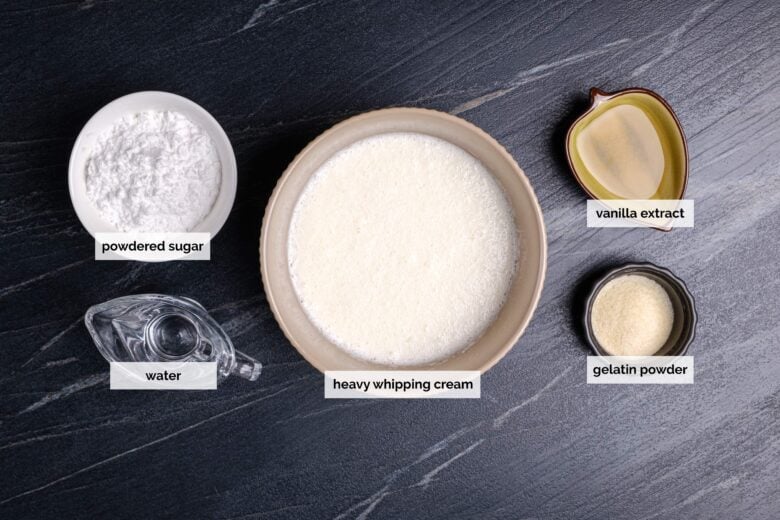
- Heavy Whipping Cream – The star ingredient of any whipped cream recipe, heavy whipping cream has the perfect fat content for that light, fluffy texture. Make sure it’s chilled before whipping.
- Powdered Sugar – We use just 4 TB of powdered sugar to sweeten the whipped cream just right. Powdered sugar also helps make it light and airy.
- Unflavored Gelatin – The gelatin helps Stabilized Whipped Cream hold it’s shape for days.
- Vanilla Extract – We like adding a dash of vanilla extract to our whipped cream for optimal flavor.
Substitutions And Variations
This simple recipe is very versatile. As long as the base stays the same, there are endless flavor combos that go amazing with it. Take a look at some of our favorite variation ideas:
- Flavored Gelatin: Although this recipe uses unflavored gelatin, you can absolutely experiment with different flavored gelatins to see which one you like most.
- Chocolate: Add cocoa powder to whipped cream for that rich, chocolatey goodness. It would be delicious with this Molten Chocolate Pudding Cake.
- Citrus: Add the zest of lemon, lime, or orange into the whipped cream mixture for a bright, vibrant pop of flavor. Lemon stabilized whipped cream would be amazing with these Lemon Bars with Shortbread Crust.
- Coffee: If you can’t get enough coffee, try mixing in instant coffee granules or Kahlua like we do in this decadent Double Chocolate Cake recipe.
Step-By-Step Instructions
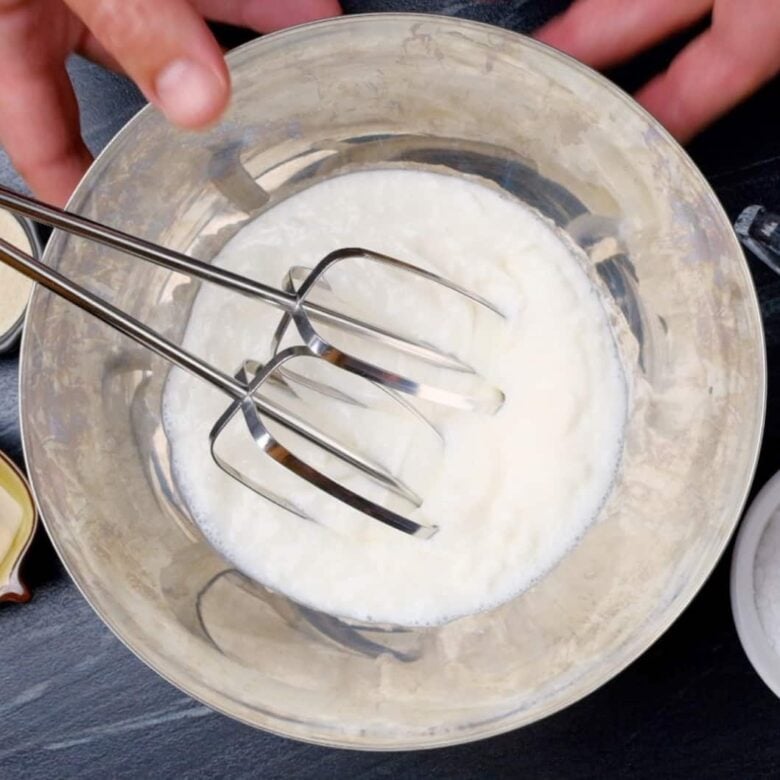
- Pour heavy whipping cream, vanilla extract, and powdered sugar into a bowl and place whole bowl along with the whisks to the electric mixer in the fridge for 5-10 minutes.
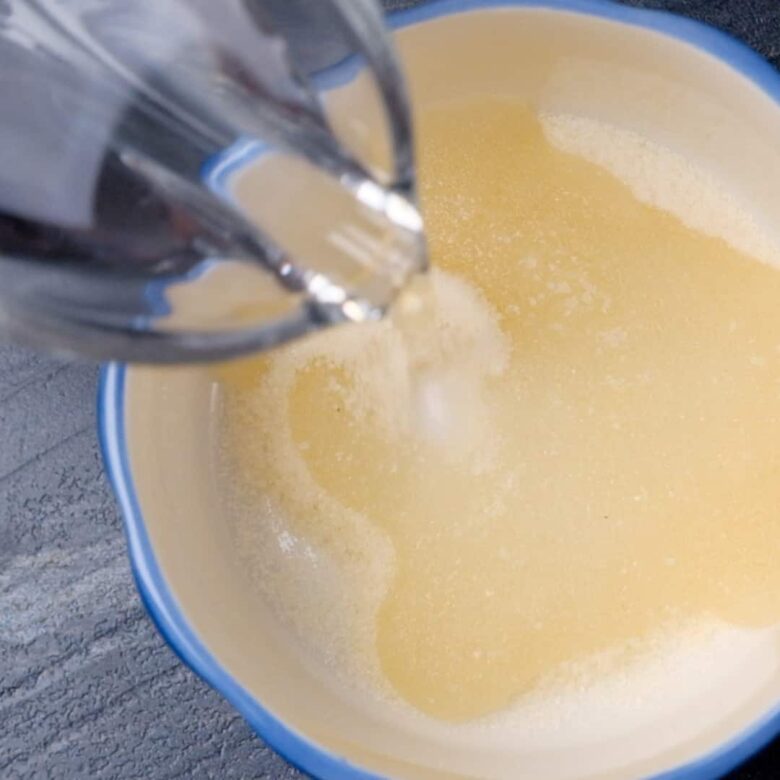
- Combine gelatin powder and water until the gelatin soaks up all the water. Then microwave for 15-20 seconds.
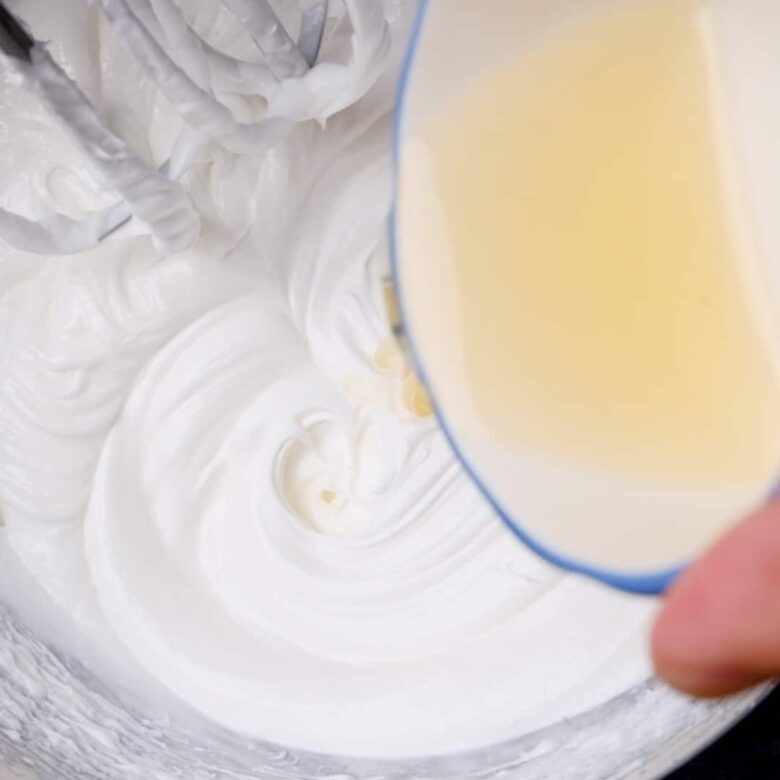
- Remove heavy whipping cream bowl from the fridge and beat until soft peaks form.
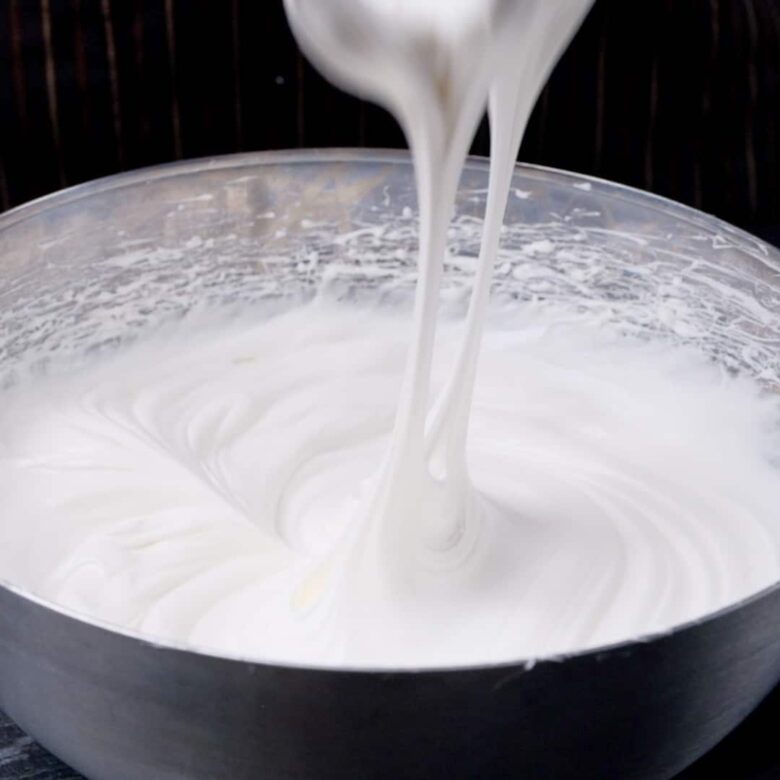
- Continue beating cream mixture while slowly pouring in warm (not hot) gelatin mixture.
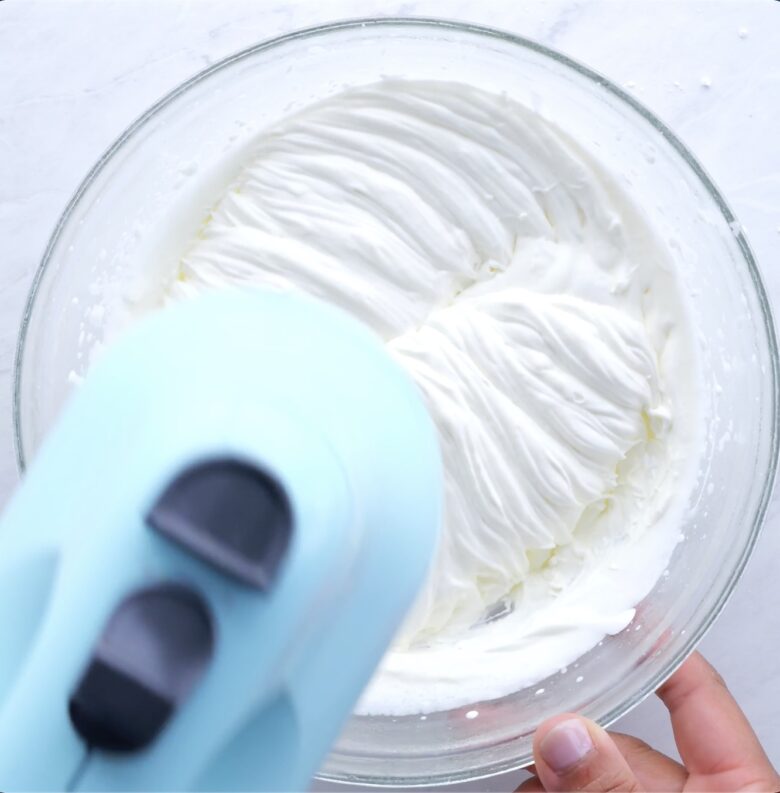
- Continue beating whipped cream until stiff peaks form. Mixture should have structure and hold shape at this point.
- Top your favorite dessert or homemade ice cream with light and fluffy stabilized whipped cream.
How To Prep Ahead
This recipe keeps extremely well in the fridge or freezer making it a perfect make-in-advance option. Take a look at our favorite prep-ahead ideas for this whipped cream:
- Refrigerate: Fully prepare this stabilized whipped cream and store in an airtight container in the fridge for up to 3 days. You can also top your dessert with whipped cream and keep in the fridge for the same amount of time.
- Freeze: Stabilized whipped cream will keep by itself or on a dessert for up to 2 months in the freezer. Simply thaw fully before using.
- Be Ready: This recipe comes together in just 10 minutes. To make things go smoothly, we like having all ingredients measured and ready-to-go before we start the process.
What To Serve With Stabilized Whipped Cream
- Cake: Serve this whipped cream on your favorite cake recipes! We think it would be especially amazing on this 6-Ingredient Butter Pound Cake or this decadent Gluten Free Flourless Chocolate Cake.
- Pie: We love topping our Favorite Chocolate Pie with this perfectly light and creamy garnish. It’s also the perfect option to take The Best Pumpkin Pie to the next level.
- Cheesecake: Cheesecake anyone? Serve this stabilized whipped cream with our favorite White Chocolate Raspberry Cheesecake Recipe or on this classic Perfect New York Cheesecake.
- Ice Cream: We couldn’t have a whipped cream recipe without at least mentioning ice cream once. If you’ve never tried making homemade ice cream, we urge you to make Creamy Vanilla Bean, Easy Chocolate, or Strawberry Ice Cream. You won’t regret it!
Commonly Asked Questions
Stabilized whipped cream can last 2-3 days when made in advance. Cover and chill until ready to use. Stabilized whipped cream that has been piped onto desserts can also be chilled for up to 3 days, and frozen for up to a month.
Yes, stabilized whipped cream can be kept at moderate room temperature for several hours. If your room temperature is very warm, you’ll want to keep your dessert in the fridge until ready to serve.
It’s important that your water/gelatin mixture is warm (but not hot) while it’s being slowly drizzled and whipped. If gelatin mixture has coagulated, simply give it 10 seconds or so in the microwave to liquify it again.
When your whipped cream forms soft peaks, it will slightly hold it’s shape when you lift up the whisk, but it will quickly fall back into the bowl. When it has stiff peaks, the cream will hold it’s shape without falling.
Blooming the gelatin simply means soaking it in cold water until it absorbs some of the water and gets a gel consistency. We do this in this recipe to help prevent lumps in our whipped cream.

Stabilized Whipped Cream
Ingredients
- 2 cups heavy whipping cream, very cold
- 4 tablespoons powdered sugar
- 2 tablespoons vanilla extract, or Kahlua or other flavored extract
- 2 teaspoons unflavored gelatin powder, Knox
- 2 tablespoons water
Instructions
- Pour cold heavy whipping cream, powdered sugar, and vanilla extract in a large metal bowl. Place bowl and whisks of electric hand mixer in fridge for 5-10 minutes to make everything cold.
- Meanwhile, combine gelatin powder and 2 TB water in a small glass bowl. Once water has been fully soaked up by the gelatin, microwave the mixture for 15-20 seconds. It should become a thick, hot liquid. Stir well and let sit at room temp.
- Remove the bowl from fridge. Beat on medium-high until soft peaks just start to form. Set aside and check the gelatin mixture; it should be a warm liquid*
- Resume beating whipped cream, while slowly drizzling liquid gelatin right where the whisks are beating, to ensure it is being fully incorporated.
- Beat whipped cream to stiff peaks. Try to stop beating right at stiff peaks, but if you accidentally over-beat it a little bit, don’t worry. It will still frost and pipe fine.
Notes
- If gelatin mixture has coagulated prior to whipping into the cream, microwave a few seconds at a time until it turns liquid again. If it’s too hot, stir until it cools down to a warm liquid.
- This recipe yields approximately 4 cups of stabilized whipped cream.
- Stabilized whipped cream can be made ahead of time, covered, and chilled in fridge for several days until ready to use.
- You can frost, pipe, and decorate your dessert up to 2 days in advance. Keep dessert chilled until ready to use.
- You can use stabilized whipped cream on desserts such as mini cheesecake bites and favorite pie recipes.
- Freeze leftover stabilized whipped cream for up to 2 months.
- For fun flavor variations, see original article.
- If you enjoyed this recipe, please come back and give it a rating. We ❤️ hearing from you.
Nutrition (per serving)
More To Bake And Eat
- White Chocolate Raspberry Cheesecake Bites – These little morsels of New York style cheesecake are both pretty and mouthwatering. They boast that creamy, smooth, and rich texture that makes us crazy for cheesecake.
- Baileys Irish Cream Chocolate Cake with Whipped Cream Frosting – Tender, moist, and rich, this luscious chocolate cake is amazing all year round. We top it with a light and fluffy whipped cream frosting.
- Flourless Chocolate Cake (Gluten Free) – This chocolate torte is rich, smooth, and a chocolate-lover’s dream come true. It’s also gluten-free!
- Easy Key Lime Pie (Make Ahead) – We’ve tried dozens of key lime pies, including key lime pies made at bakeries throughout Key West; this homemade version is the unanimous winner.