Rosemary Garlic Bread
- By Amy Dong
- Updated Sep. 20, 2024
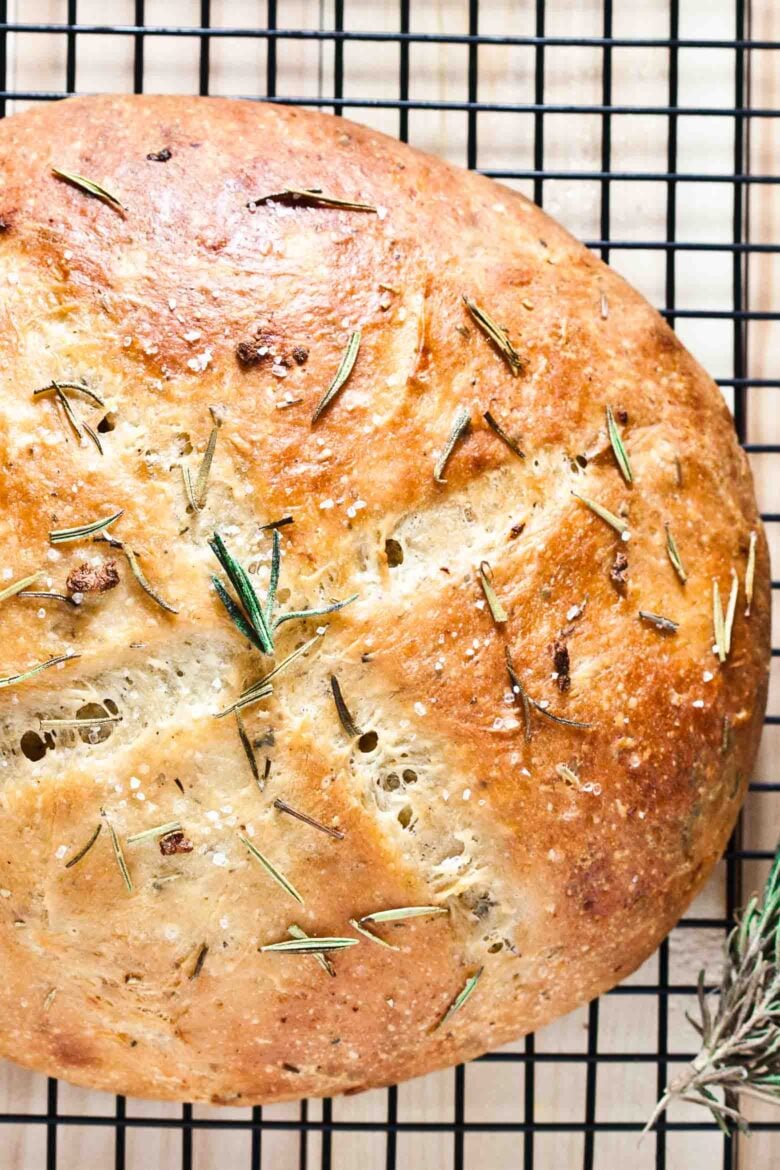
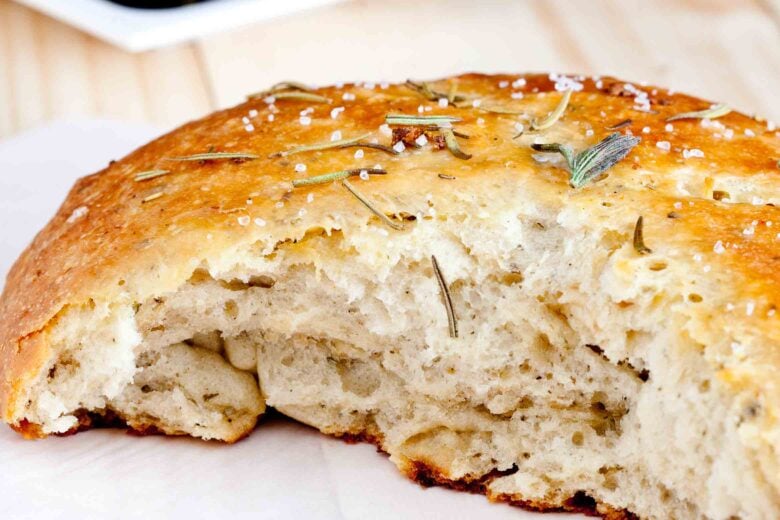
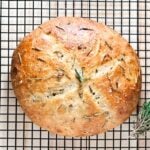
This rustic rosemary garlic bread is wonderfully golden brown on the outside with a soft, fluffy center and plenty of garlic flavor. Readers have been loving this bread for over a decade on this site. Anyone can make this restaurant-quality bread; reminds people of Macaroni Grill Rosemary Bread!
In This Article
This post may contain affiliate links, at no additional cost to you.
Video: Watch Us Make This Recipe
Why This Recipe Stands Out
- No Special Equipment: Kneaded by hand, it’s quick and easy to make – no bread maker required!
- Beautiful Texture: It’s crusty on the outside yet soft on the inside making it great for dipping.
- Friends and Family: With 8 servings per loaf, it’s the perfect option for feeding a crowd.
- Aroma: Simple pantry staples create bold, mouthwatering flavor with aromatics that will have you drooling as it bakes.
- WAY Better Than Restaurants: Baked fresh and served warm, it blows even the best restaurant bread out of the water. It’s as good as or even better than Macaroni Grill rosemary bread!
Key Recipe Ingredients
- Active dry yeast combines with water, sugar, and salt to add flavor to the dough and provide structure to the bread, creating the fluffy texture we’re looking to achieve.
- Bread flour is then added to the mix to complete the base of the dough. We also use it for our chewy homemade bagels.
- High-quality olive oil is drizzled on top, acting as a tenderizer and keeping your rosemary garlic bread soft.
- Plenty of flavor belongs here! Rosemary, black pepper, oregano, and roasted garlic create a savory flavor that is out-of-this-world delicious.
Step-By-Step Recipe Instructions

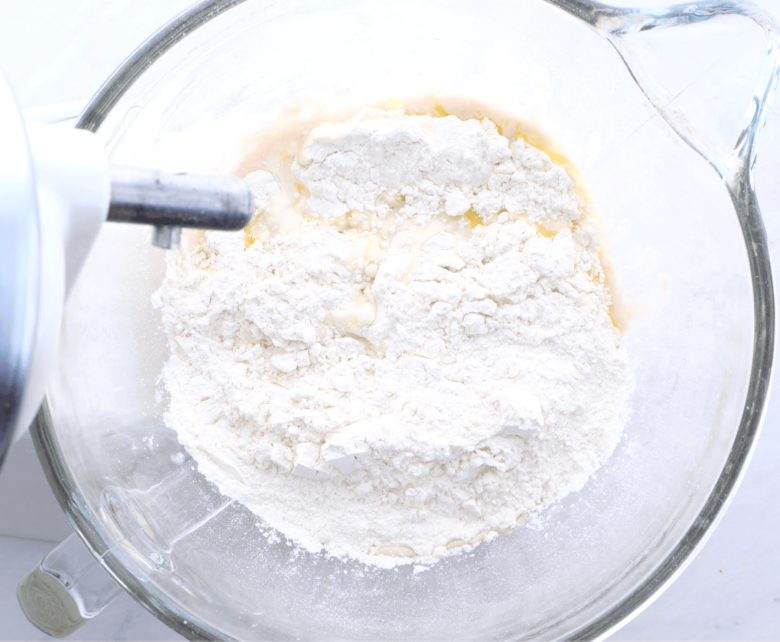
- In large bowl, Sprinkle yeast into 1 cup warm water. Mix in the sugar and salt. Let sit for about 10 minutes or until it foams.
- Add in olive oil. Add flour and knead (by hand or stand mixer/hook) for about 10 minutes.
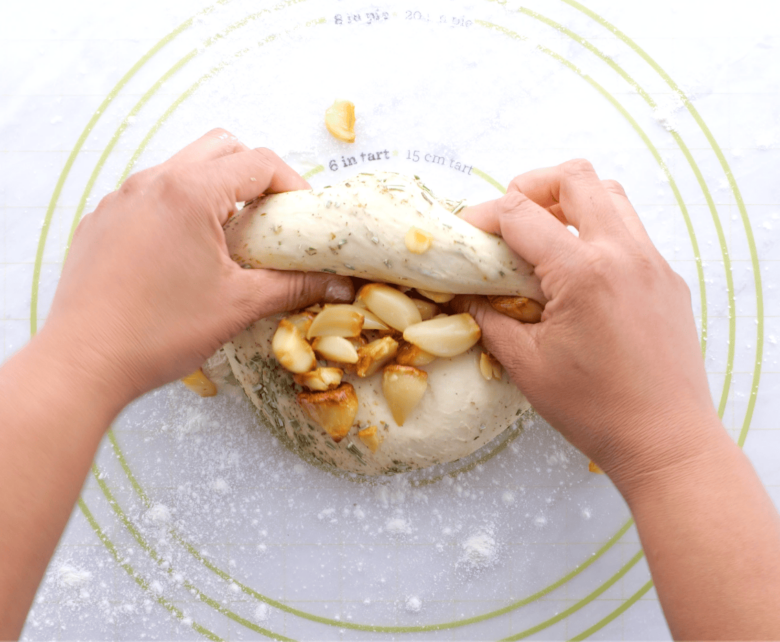
- Add rosemary, black pepper, and oregano. Knead another 5 minutes. Knead in roasted garlic.
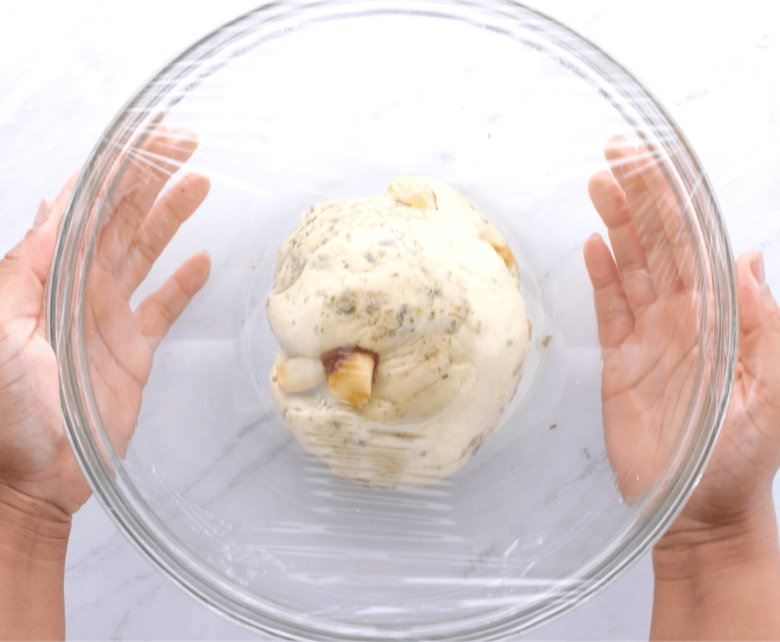
- Place dough ball in oiled bowl, turning dough a few times so that dough surfaces are protected by oil. Tightly cover bowl with cling wrap. Place in a warm, draft-free area to rise until dough is doubled.
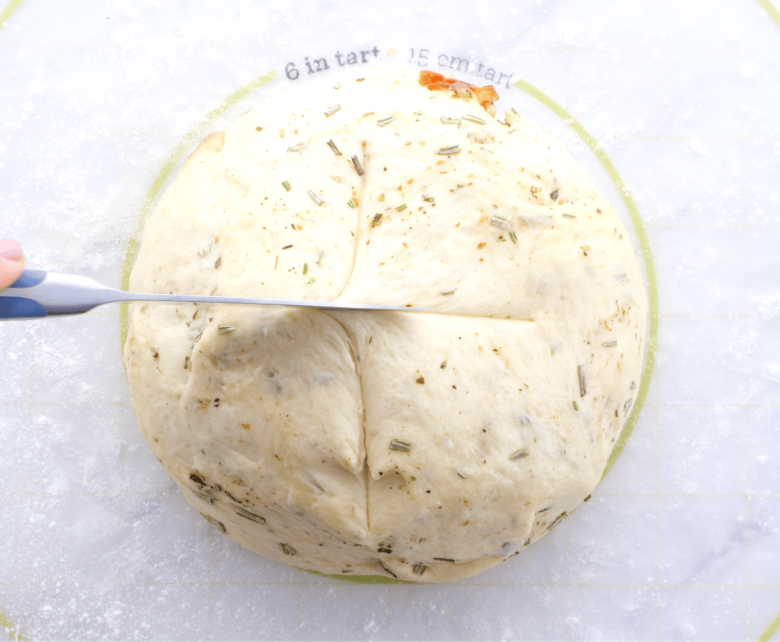
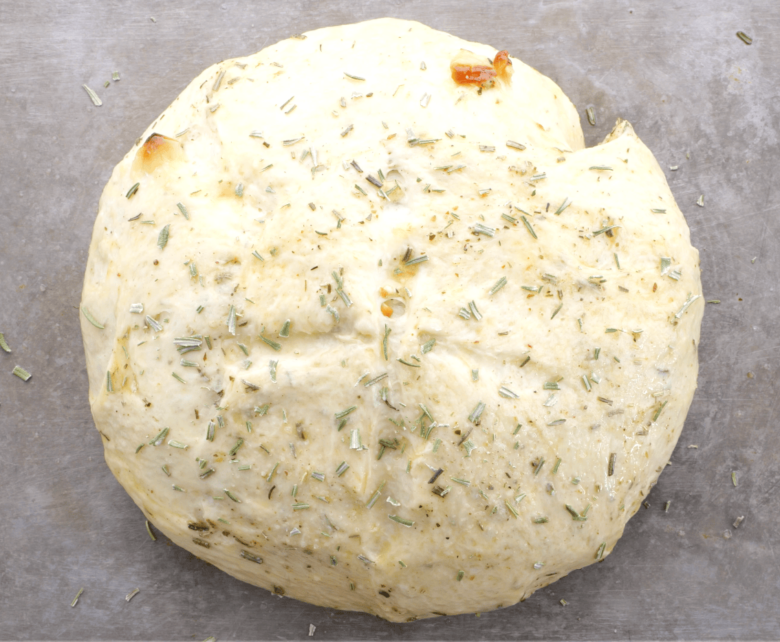
- After dough is doubled, gently punch it down and shape into a rounded loaf. Using sharp knife, make a criss-cross design on top. Cover up loaf with large mixing bowl inverted over it and let rise until doubled again.
- After dough has doubled again, very gently brush with olive oil, sprinkle with coarse sea salt and a bit more rosemary.
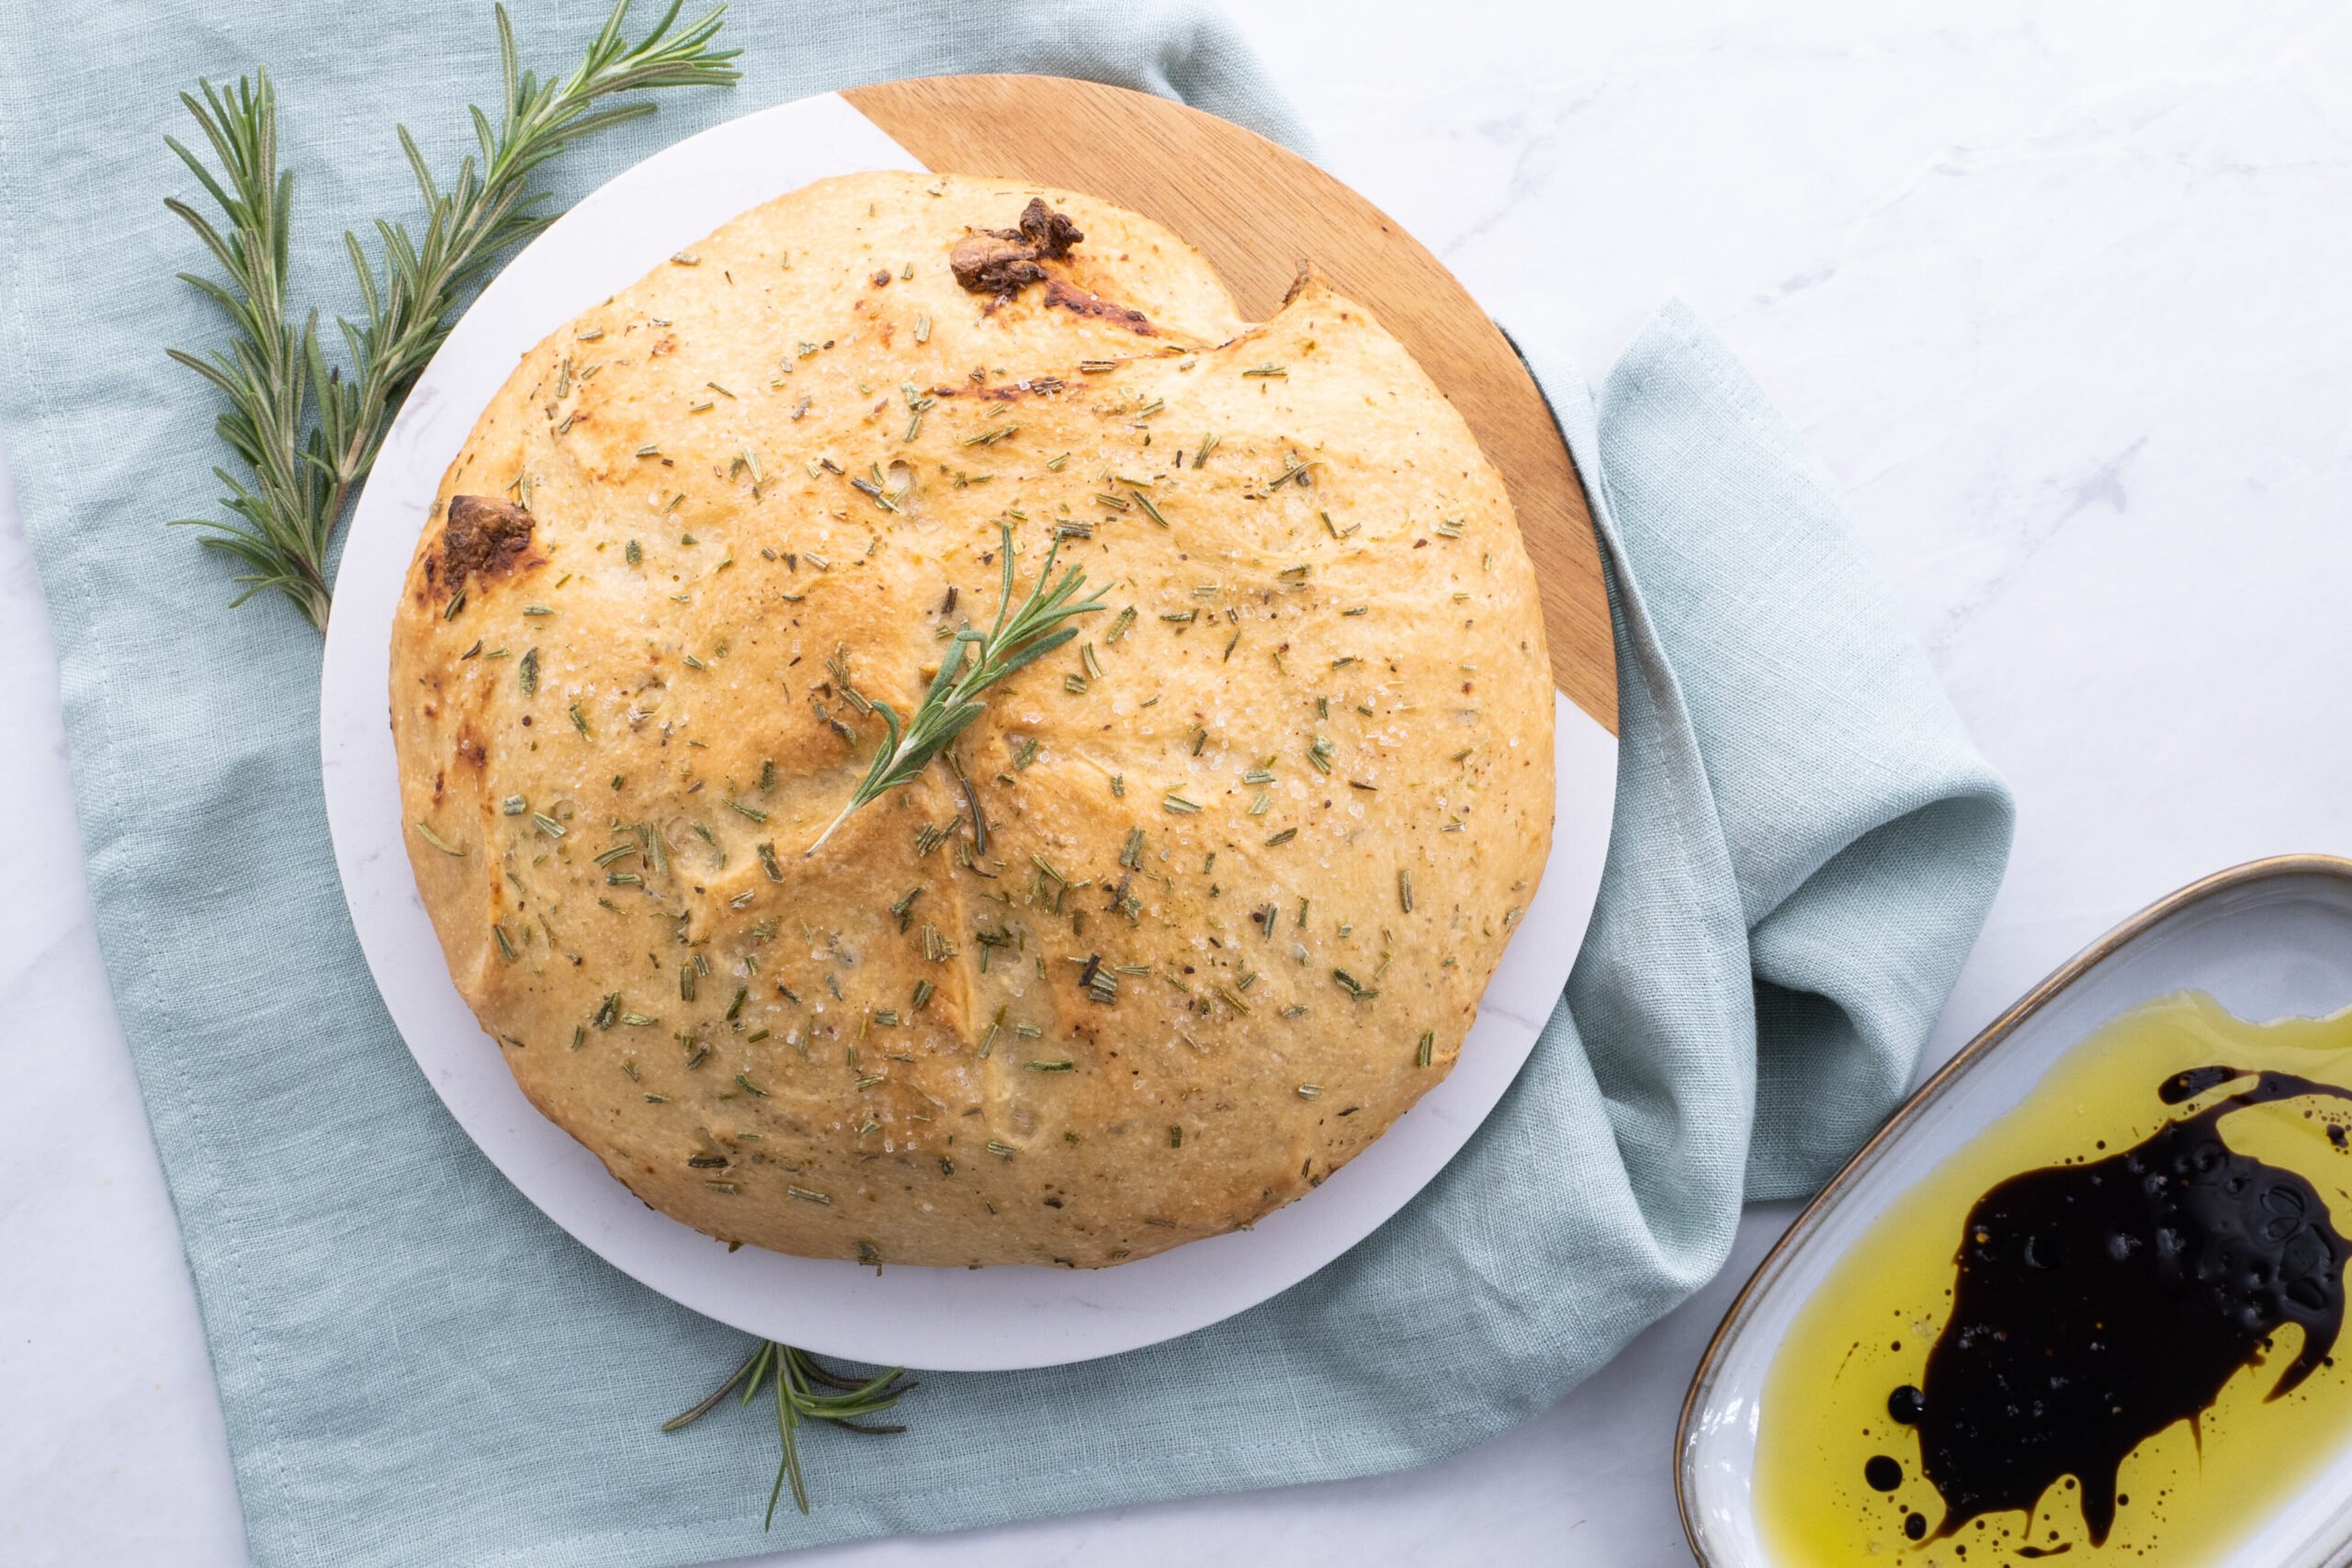
- Bake and let bread rest before cutting into it. Serve warm, with your favorite blend of good olive oil, freshly ground black pepper, and balsamic vinegar!
Pro Tips for Success
- Be sure your yeast is very fresh to ensure a good rise.
- Let the yeast sit long enough to activate. Otherwise, your bread won’t rise in the oven! You’ll know it’s ready when it begins to foam.
- Measure the ingredients carefully, taking care not to “tap down” flour when measuring. Always use dry measuring cups and the scoop and scrape method as described here.
- You can roast several heads of garlic ahead at a time and keep them airtight in the fridge to use for recipes like this. Roasted garlic can last nicely for up to a week.
- To speed up the rising process, place your rosemary garlic bread in an oven that has been slightly warmed up.
- After 25-30 minutes of baking, bump up the temperature of your oven to 425F, and spray your loaf with water. This will help create that nice thick crust while preventing your bread from burning.
- Every oven bakes slightly differently. So, be sure to keep a close eye on your bread, and remove it from the oven as soon as the top has turned golden brown!

Once you’ve mastered your hand at this bread, you will find this easy pizza dough a breeze for making homemade pizza!
How to Prep Ahead
This delicious bread is best when made and served the same day. However, a key tip we have for prepping ahead is roasting the garlic ahead of time. This can be done a day or two before you plan to make the bread.
As always, the dry ingredients and herbs can be measured out 1-2 days beforehand.
Commonly Asked Questions
In general, rustic bread is considered to be a type of bread that is made with simple ingredients including flour, water, salt, and yeast. Furthermore, it is shaped by hand rather than molded with a bread pan and baked at a higher temperature than other loaves. As a result, it has a thick, crusty, flaky exterior and a soft, fluffy interior.
You can absolutely use either dry or fresh rosemary. The amounts will stay the same. If rosemary u0022leavesu0022 are very long, you may roughly chop them before use.
Bread flour is our flour-of-choice, as it contains a higher gluten content, which means you’ll enjoy a softer, chewier texture.
The reasons for bread that doesn’t rise well are typically: old yeast that has been sitting the in the pantry too long, room temperature being too chilly for a good rise, or using water that was too hot for the yeast to thrive in.
This is most often due to over-proofing, which is when dough has been left out to rise for too long.
This can be due to over-proofed or under-proofed dough during rise time, yeast or bread flour that isn’t super fresh, or an oven that was not preheated long enough. Inaccurate flour to water measurements can also affect the outcome of your loaf.
The bread is done once it has puffed up/risen nicely in the oven and the top is golden brown. Towards the end of baking, start checking to ensure it’s not over-baked (do not open the oven door until it’s done).
This rustic garlic bread recipe is best eaten right away while still warm from the oven. However, on the rare chance you happen to have leftovers, they can be stored in an airtight container at room temperature for 2-3 days or in the freezer for up to 2-3 months. To enjoy, let your frozen bread thaw in the refrigerator overnight. Then, warm it in the microwave or oven at 300F for 10-15 minutes or until it is soft and heated through.
Our favorite way to devour this recipe is dipped in olive oil and balsamic vinegar while it’s still warm. However, it would also taste incredible used in a garlicky breakfast sandwich, served alongside cozy soup or hearty chili, or used to soak up the last of your favorite homemade spaghetti sauce!
Did you make this?
Please give us a rating and comment below. We love hearing from you!
Rosemary Garlic Bread
Ingredients
- 1 ½ teaspoons active dry yeast
- 1 cup warm water, 110-115F
- 2 teaspoons white sugar
- 2 teaspoons fine salt
- 3 tablespoons extra virgin olive oil
- 2 ½ cups bread flour
- 1 tablespoon dried rosemary
- ¼ teaspoon freshly ground black pepper
- ½ teaspoon dried oregano
- 1 head of roasted garlic
- extra olive oil for brushing on top and serving
- coarse sea salt for sprinkling on top
- clean water in spray bottle
Optional for Serving
- olive oil, extra virgin
- balsamic vinegar, good quality
Instructions
- In large bowl, Sprinkle yeast into 1 cup warm water. Mix in the sugar and salt. Let sit for about 10 minutes or until it foams.
- Add in olive oil. Add flour and knead (by hand or stand mixer/hook) for about 10 minutes.
- Add rosemary, black pepper, and oregano. Knead another 5 minutes.
- Gently knead in roasted garlic by hand, about 1 minute. Dough should come together well at this point; slightly sticky is fine, but still should be manageable.
- Place dough ball in well oiled bowl, turning dough a few times so that dough surfaces are protected by oil. Tightly cover bowl with cling wrap.
- Place in a warm, draft-free area to rise until dough is doubled, approx. 1 hour, depending on room temp (if your room is cooler, it could take 2 hours.)
- After dough is doubled, gently punch it down and shape into a rounded loaf. Using sharp knife, make a criss-cross design on top. Place rounded loaf on greased baking sheet.
- Cover up loaf with large mixing bowl inverted over it. Make sure bowl is large enough that it gives your loaf room to rise. Let rise until doubled again, approximately 1 hour.
- After dough has doubled again, very gently brush with olive oil, sprinkle with coarse sea salt and a bit more rosemary. Try not to deflate loaf at all.
- Bake at 375F for 25-30 minutes, spraying loaf with water once during the middle of baking.
- Bump oven up to 425F and spray loaf with water again. Watch carefully – bake just until top is a nice golden brown, taking care not to over bake (it should be pretty quick).
- Let bread rest 5 minutes before cutting into it. Serve bread fresh and warm, with your favorite blend of good olive oil, freshly ground black pepper, and balsamic vinegar!
Equipment
- Dry Measuring Cups, flat-topped
- Spray Bottle, fine mist
Notes
- Be sure your yeast is very fresh, to ensure a good rise. Replace yeast if it’s been sitting in pantry for a long time. Tip: Store newly purchased yeast in the freezer for longer shelf life.
- Measure ingredients carefully, taking care not to “tap down” flour when measuring. Always use dry measuring cups and use scoop/scrape method as described here.
- You can roast several heads of garlic ahead of time and keep them airtight in fridge to use for recipes like this. Roasted garlic can last nicely for up to a week.
Nutrition (per serving)
More to Eat and Bake
- Sweet Potato Bread – Say goodbye to bland and boring bread with this scrumptiously sweet quick bread option.
- Easy Cheesy Garlic Bread – Soft, chewy, cheesy, and full of garlic, this bread has everything you could ever want in a warm loaf and so much more.
- Best Banana Bread Recipe – This is by far the most irresistible banana bread we’ve ever had the privilege of sinking our teeth into; just one bite and we’re sure you’ll agree!
- Healthy Pumpkin Bread – Yes, it’s healthy! But you’d never guess given how delicious it is.
- Moist Zucchini Bread – This tried and true recipe is tender, flavorful, and perfect for breakfast.